

Exploring Collaboration Part 3 - Collaboration Myths
About this collaboration series
Ellyn Zinsmeister and I love exploring collaboration, and to share that love we are preparing a series of blog posts. about collaboration. Twice a month, on the first and third Wednesdays, we will be covering related topics from our own perspectives. This series began with an overview of two types of quilting collaborations – block swaps (over on Ellyn’s Space) and series collaborations. Then, we shared tips and techniques for successful collaborations, with Ellyn focusing on setting up bees and swaps and me focusing on series collaborations and some specific tips for working with round robins. Today we’re investigating some myths that might dissuade you from collaborating. I’m covering “I’m not good enough to contribute to that project” and “I will receive wrong-sized/colored/sewn blocks” and Ellyn covers “Other people will not follow through” and “I won’t get enough blocks to make a functional quilt.”

Why collaboration myths?
At a quilt group meeting a while ago, the discussion turned to collaborative quilts. With many opinions in the virtual room, a fear of collaborative projects was present for most people. I heard many variations of, “I couldn’t do that because....” You probably know by now that I love collaboration, and I would love to see more people involved in collaborative projects. Whether you’re hesitant to contribute to a project or to design a project of your own, two myths I would like to address are “I’m not good enough” and “I will receive noncompliant work.”
Myth: “I’m not good enough to contribute to that project”
Are you surprised this myth is FALSE? The tricky pat is that you may not have the inclination, tools, or the time, to produce work that meets the project parameters, but you are definitely good enough. When you are deciding whether to contribute to a collaborative quilt, consider what will be required. If you are captivated by the project but lack the tools or skills, you can buy or borrow the right tool or prioritize learning the new skill. One of the reasons I love collaborative quilts is the opportunity to stretch my skillset. Whether by making blocks to exacting precision or exploring an uncomfortable color palette, I have used collaborative projects to grow my skills. When you approach the project from that perspective, rather than a self-conscious self-dismissal, you can find the same growth mindset and conquer new skills.
A lack of time is a constraint to deal with as soon as possible. While it’s important to respect time constraints, honest communication is the best policy if you find yourself falling behind. Perhaps a deadline can be negotiated or help can be offered. You don’t know until you ask! To be set up for success, collaborative projects should be designed with some flexibility built in, and any areas of inflexibility should be clearly communicated.
Myth: “I will receive noncompliant work”
This myth is…partially true, but that’s not a bad thing. It’s something to plan for.
In my last post, I shared some specific tips for working with imperfectly flat or square round robin projects, but let’s talk about block-based collaborations here. We’re assuming now that you are in control of at least some of the parameters of the project. Noncompliant blocks are to be expected, and may come with color variation, surprising fabric choices, different sizing, and construction errors. I’ll share some tips for planning a project to accept these variables, and for working with them once they arrive. And we’ll use my Scrappy Cat Trip quilt as an example to illustrate the solutions.

Scrappy Cat Trip quilt made by Karen Bolan with blocks by Karen, Moonlight Quilters of Sonoma County, 2017 Stash Bee Hive 8, and Cathleen Wolford
How to plan for, and work with, color variation
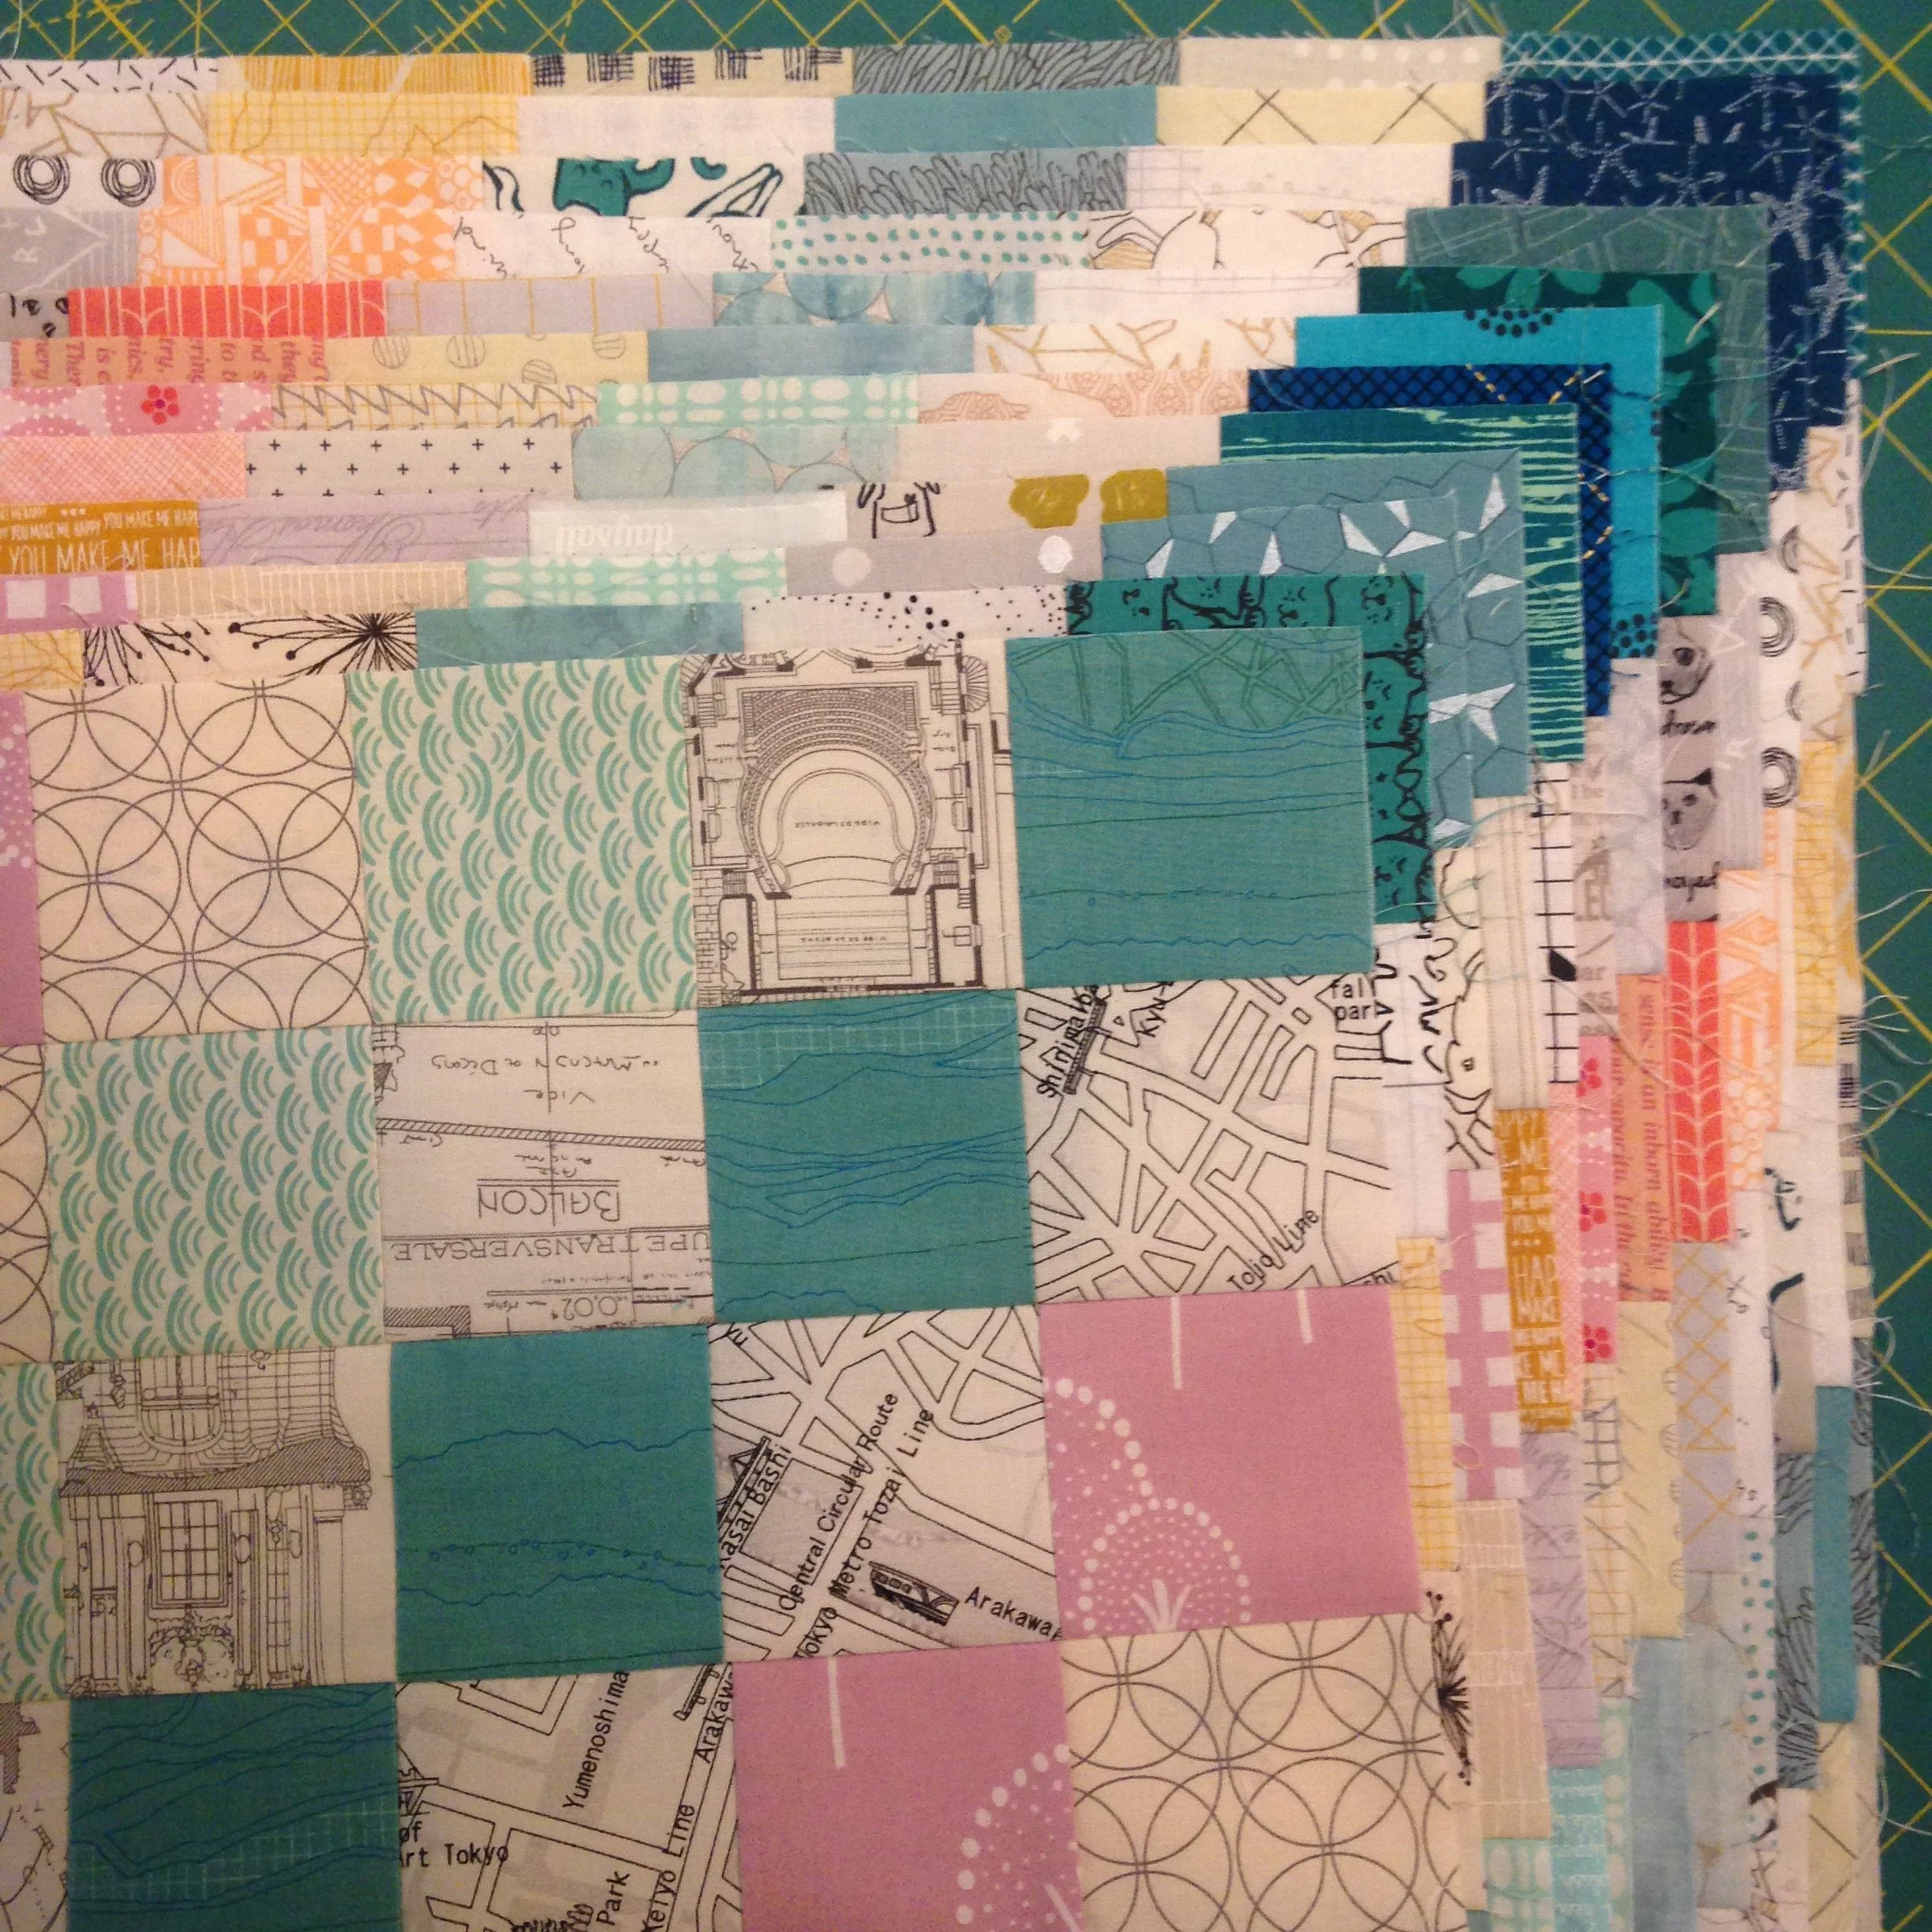
Defining a color palette for a collaborative project should include, at least, descriptions of hue (color), saturation (intensity), value (lightness and darkness). Showing a color palette and a fabric pull example can help to describe your expectations. The color parameters for the Scrappy Cat Trip quilt were to choose six fabrics: three low volume, one dark teak, one medium to light teal, and one warm pastel. The limits were different for different parts of the color spectrum because I wanted to force more variety in the warm tones than the rest of the quilt. When making a call for blocks made from other contributors’ fabrics, expect a variety. Even when placing fairly strict limits on a color description, expect variety. Choose a block pattern that highlights or disguises the variety you expect. For this quilt, my stash was limited in the warm colors, so I asked for the most variety in that category to create movement I wouldn’t have otherwise.
Once I received the blocks, from multiple sources (20 of the blocks were made by others), I saw the variety I was expecting, and some I wasn’t expecting, and had to get to work on making it work together. Most unexpectedly to me was the variety in the dark teal color. Some people chose what I would classify as medium value. Can you find the blocks with lighter diagonals? Can you see how I grouped them together, and transitioned to darker diagonals, to disguise the color variation? I also had multiple blocks with a light teal that leaned more green than blue. Most of those blocks are concentrated toward the bottom of the quilt. By grouping them, and making some blocks intentionally as transition blocks, the color variation seems more intentional. Strategies for working with color variation include grouping like colors, using or creating transition colors between groups, and most importantly, embracing the variety that makes a collaborative quilt unique.
How to plan for, and work with, fabric variation
The project parameters are used to set expectations for the project, including fabric requirements. You can set parameters for fiber content (cotton, linen, wool, etc.), pattern style (modern, geometric, novelty, batik, solid, animal, historical reproduction, specific designer, etc.), and anything else. To avoid unpleasant surprises and unhappy contributors, keep in mind the contributors’ access to the specified fabrics and plan for exceptions. If you NEED a certain specific fabric to be present in the quilt, consider making blocks yourself with it, or providing the required fabric to your participants. For Scrappy Cat Trip, I asked for prints in quilting cotton, which was intentionally open to interpretation.
When I received blocks, there was the expected variety in what I received. One block was made with all solids (can you spot it?), a few with all batik (can you spot them?), and some with heavier- and lighter-weight cotton and linen (OK, the linen blocks were my addition). To work them all in, I again played with the layout until transitions seemed to flow without highlighting any particular variation. I don’t tend to subscribe to “rules” about only using certain kinds of fabric in quilts, so I was comfortable mixing it up. If you end up with unexpected fabrics, you have a few options. My favorite is to take the opportunity to expand your skillset by finding a way to combine them all. Fabric is just fabric! If it’s really not working, you can respect the contribution by communicating with the maker, or by using their block in a complementary project like a bag or pillow.
Twelve of the blocks I made for Scrappy Cat Trip, showing variety in the fabrics I used to bridge some of the variety in the blocks I received.
How to plan for, and work with, size variation
Despite the best efforts of the Quilt Police, each quilter will cut fabric with a different line, and sew with a slightly different seam allowance. The resulting blocks will never be all the same. When you design a collaborative quilt project with block contribution, it’s crucial to understand your contributor’s’ experience levels. If you’re working with some less-experienced quilters, or some more-carefree quilters, plan a block design that allows flexibility in sizing, or can be trimmed to size without losing important features (like points). Also consider providing a tutorial or teaching a skill needed to make a more accurate block. My Scrappy Cat Trip quilt block instructions included a tube-piecing technique that may have been new to some, so I included a link to a video tutorial. While the block doesn’t have points to match, there are many intersections along the edges that could be aligned. I was expecting some variety.
I received blocks that were up to half an inch larger and smaller than the designated size. With the 16-inch blocks, this was acceptable and I felt good about easing the blocks together for approximate fitting. Some intersections aren’t perfect, but I prioritized accuracy on the high-contrast intersections between the dark teal and adjacent low volume colors. Another way to work with size variation, though it wouldn’t have worked with this block, is to add sashing. Like compensating strips in medallion-style quilts, sashing blocks with a variable size is a good non-destructive way to unify them for easier construction.
How to plan for, and work with, construction errors
Sometimes, despite our best efforts, quilt blocks just don’t come out right. Commonly this includes flipped or rotated block components, and less commonly, it includes poor construction. To minimize frustration about the former, identify possible areas of confusion and clarify instructions or provide tips for accurate placement. For the latter, provide an opening for communication and resources for skill building. If you’re not comfortable working with these potential errors, partner with someone who is, strategically choose an easy block design, choose your contributor group with care, and communicate expectations clearly.
Some projects will be lucky and without any errors to address, while others will have several. For rotated, misplaced, or flipped block elements, find a way to incorporate the unique block variations, ask the contributor to resubmit, carefully unpick and re-sew the block yourself, or as a last resort prepare an extra block yourself and use the noncompliant block in a different project or on the back. For construction issues that will compromise the integrity of the quilt, I first try to re-sew the block, but if that is not possible I arrange a private conversation with the contributor and offer resources for skill building. In Scrappy Cat Trip, I was lucky (some credit goes to the planning stage!) and only had a few construction issues to fix. The method to make the blocks includes cutting through an already-pieced strip set, which provides an opportunity for secure seams to come apart. That happened in a few blocks and I was able to easily add some tacking stitches to the splitting seams. They will never be found. If I were to use this block in the future for another collaboration, I would add extra discussion about stitch length, which might help prevent the splitting.
Now I want to hear from you
As I’ve been writing this post, I feel again like there is SO MUCH to say on this topic. Have you hesitated to contribute to a collaborative quilt, or start a project of your own? What holds you back? What fears do you have about collaborating? Have you tried any of the techniques above? How did it work out? Tell me in the comments!
Finally, a shameless plug
Did you know I teach and lecture for quilt guilds? If you are interested in seeing more from me about collaboration, check out my “Collaboration is fun” lecture and ask your guild program chair to reach out. Thank you!